My kids love getting messy with craft, clay, paint and generally being creative. So this term I have been determined to make sure that we complement our Tapestry of Grace studies with more hands on activities.
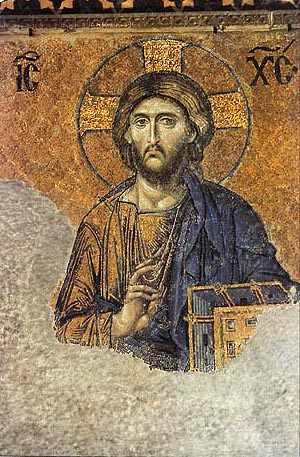
Our study of the Byzantine Empire inspired our art studies and there are so many different art activities one can do. Once we had spent enough time looking at the different aspects of Byzantine art from its architecture to mosaics and brilliant illuminations, I had to decide what we would take on.
Mosaics
Print a blackline picture drawn in Byzantine style on card stock, enlarge it and stick your tiles to it.
Click here for a good source of Byzantine style colouring pages. This idea could easily be adapted to use paper tiles, coloured egg shells or glass tiles.
Other ideas for Mosaics:
Artists Helping Children is a good site with lots of different mosaic ideas.
KinderArt has a cute lesson on bean mosaics.
Frescos
Ms Julie's Art School has a great post on making a fresco using a blackline drawing. In this post, she is using a drawing from a fresco by Giotto Di Bondone but it is easy enough to substitute with one of the Byzantine colouring pages provided in the link above.
Illuminations
This is the project that we picked in the end and I was very pleased with it. This site is fabulous for teaching your kids about manuscripts and illuminations. They have a slide show which shows a number of different illuminations and asks questions which allow the kids to explore each manuscript more closely and then it gives you more information about the manuscript you are observing. There is another resource that shows you how manuscripts were made, the different roles and the whole process. They also provide templates for you to make your own manuscript illuminations.
Creating a whole manuscript page would have taken more time than we had, so I decided that they should create their own illuminated letter which was a smaller more manageable project.
I found this fantastic PDF lesson on the Art Of Creating Illuminated Letters which I used as the basis of my instruction. Then I used a free download from Prose and Letters which distilled in one page the essence of how to draw a medieval border. We then surfed online to look at different types of letter fonts and calligraphy to help them decide how they wanted to draw their letter. We used felt tip pens, coloured pencils and various metallic pens to get the right effect.
I was pleased with the end result.
Other Illumination resources:
This Lesson from the Utah Museum of Fine Arts is full of useful information.


6 comments:
This is such a beautiful blog. Even if it wasn't educational, I would still have a look at it.
I have an award for you over at my blog. http://homeschooljournal-bergblog.blogspot.com/2010/10/versatile-blogger-award-from-lady.html
Thanks for sharing these resources! I came across a couple of the sites in my research, but the fresco idea hadn't even crossed my mind.
Peace to you,
Renae
http://lifenurturingeducation.com/
Hello
Can I link to this post please?
Hi there, please feel free to link my post. Leave a link here as I'd love to see what you are doing. :)
Great post, I am almost 100% in agreement with you
Post a Comment