Showing posts with label Tapestry of Grace. Show all posts

Monday, August 23, 2010

Hands-On Activities: Byzantine Empire


My kids love getting messy with craft, clay, paint and generally being creative. So this term I have been determined to make sure that we complement our Tapestry of Grace studies with more hands on activities.
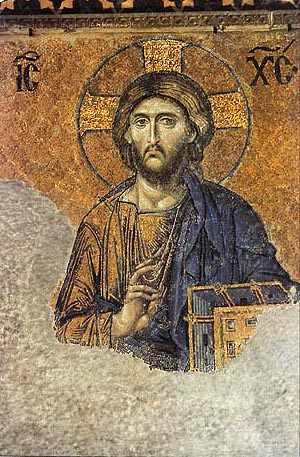
Our study of the Byzantine Empire inspired our art studies and there are so many different art activities one can do. Once we had spent enough time looking at the different aspects of Byzantine art from its architecture to mosaics and brilliant illuminations, I had to decide what we would take on.

Mosaics

  
Print a blackline picture drawn in Byzantine style on card stock, enlarge it and stick your tiles to it. 

Click here for a good source of Byzantine style colouring pages. This idea could easily be adapted to use paper tiles, coloured egg shells or glass tiles.

Other ideas for Mosaics:

Artists Helping Children is a good site with lots of different mosaic ideas.

KinderArt has a cute lesson on bean mosaics.


Frescos


Ms Julie's Art School has a great post on making a fresco using a blackline drawing. In this post, she is using a drawing from a fresco by Giotto Di Bondone but it is easy enough to substitute with one of the Byzantine colouring pages provided in the link above. 

Illuminations


This is the project that we picked in the end and I was very pleased with it. This site is fabulous for teaching your kids about manuscripts and illuminations. They have a slide show which shows a number of different illuminations and asks questions which allow the kids to explore each manuscript more closely and then it gives you more information about the manuscript you are observing. There is another resource that shows you how manuscripts were made, the different roles and the whole process. They also provide templates for you to make your own manuscript illuminations.

Creating a whole manuscript page would have taken more time than we had, so I decided that they should create their own illuminated letter which was a smaller more manageable project.

I found this fantastic PDF lesson on the Art Of Creating Illuminated Letters which I used as the basis of my instruction.  Then I used a free download from Prose and Letters which distilled in one page the essence of how to draw a medieval border. We then surfed online to look at different types of letter fonts and calligraphy to help them decide how they wanted to draw their letter. We used felt tip pens, coloured pencils and various metallic pens to get the right effect.

I was pleased with the end result.


Other Illumination resources:

This Crayon Resist Illumination lesson would be suitable to use with older children.

This Lesson from the Utah Museum of Fine Arts is full of useful information.  

Monday, May 10, 2010

Egyptian Day


These last two years, we have been working through our Tapestry of Grace (TOG) Year 1 curriculum for our Humanities studies. The focus has been on the Ancient world and we have just loved it! I never covered this in school so I was learning right alongside my girls. I plan to post about each of our individual study units in time.

One of the things that is recommended by TOG is the End of Unit Celebration. It is an opportunity to show off all the projects and work the children have accomplished over the months they have worked on a Unit. My approach to this has been to have a special day set aside where we have an "Ancient day". So, in the past two years we have had an Ancient Egyptian day, Ancient Civilisations day (which included the Ancient Americas, Ancient China and the Indus Valley), Ancient Greek and Ancient Roman days. We also celebrated our study of the Israelites with as Seder/Passover meal.
I love these and so do my children. They won't let me get away with not having a special celebration at the end of a unit now. It is a great way to review and enjoy all that they have learnt in a relaxed and fun way. It doesn't take a lot of effort but it does remain in the memory for a long time!


As it was our first celebration since we started homeschooling, I definitely went all out, making costumes and planning a really full on day. The costumes were kept simple and I've been able to reuse it for both our Greek and Roman days. I got a cheap white cotton sheet and folded it into the right length, cut a hole at the fold for the head and sewed up the sides. I also found a filmy pleated material which they wrapped around their waists. I also had some shiny gold cloth which I sewed onto one costume - you'll see my sewing skills are pretty limited hence the poor workmanship! They then adorned themselves appropriately with headbands and jewellery.


You can download the Egyptian jewellery template from Danielle's Place. I thought it worked really well! They enjoyed having the opportunity for the liberal use of black eyeliner as well. Of course, mummy and baby had to be dressed as well - since Egyptian children were usually naked, we let Adventure-man wander around in his nappy covered by a white towel. : )

We started the day with a quiz which acted as a review of the things they had learnt over the Unit. They had to start at the end of the room and for every correct answer, they got to advance one square floor tile and when they were at the other end of the room, we got into an imaginary Time Machine and travelled back to Ancient Egypt. They were able to call out famous sights and structures as we flew by them (imaginary of course!).

On our arrival, we tackled some Eyptian Math. These are a few sites that explain how they counted and calculated and it also provides some worksheets.


We then finished off a colouring book project about the 10 Plagues found here.


During our Egyptian studies they made an Egyptian hunting snake-heard throwing stick by painting a wooden spoon. We used the Hands and Hearts Discovery Kit for many of the crafts we did for this unit - it includes the kit and instructions on how to make a paddle doll, Senet (an Egyptian boardgame), how to mummify an orange, how to make your own paint like the Egyptians and it also contains a CD with lovely notebooking pages. 

We learnt that children would practice their hunting throwing skills with a stick like this so I set up a line of soft toys on the top of our chair and the girls practiced their throwing skills. We then played a game of Senet on their homemade boards.You can find out more about Senet here and play online too.


After Senet, we had a go at some of these online games about Ancient Egypt:


During lunch we stopped to watch one of our documentaries on Ancient Egypt from the Discovery Channel. After it was over, we had a look at some Egyptian recipes and decided what we would like to cook for dinner. I took the girls shopping and they helped put the meal together.

We used the following recipes:

Ancient Egyptian Marinade

Ingredients
1/2 cup olive oil
2 tablespoons ground cumin
1 tablespoon ground coriander
1 onion, grated
3 cloves garlic, finely minced
1 teaspoon cayenne pepper
salt and freshly ground pepper to taste

We marinated Chicken thighs for about 40 minutes and then grilled them in the oven, they were delicious!

Korrat (Leeks)

Ingredients
2 lbs. leeks
3 garlic cloves, crushed
1 Tbsp sugar
4 Tbsp vegetable oil or extra-virgin olive oil
lemon juice
salt
Slice the leeks into 2 inch pieces. Fry the garlic and sugar in hot oil until the sugar becomes slightly carmelized. Lower the heat and add the leeks, until they are slightly coloured. Sprinkle with lemon juice and salt. Barely cover the leeks with water and cook until tender and the liquid is reduced. 

Egyptian Potatoes

20 medium red potatoes, peeled and sliced
4 cups thinly sliced onions
3/4 cup (1-1/2 sticks) butter,
cut into small cubes
Salt to taste
Pepper to taste
6 cups tomato sauce

Preheat the oven to 200C.

Prepare the potatoes and set them aside in a bowl of lightly salted water. Lightly grease a large casserole dish with butter or vegetable oil. Spread out potatoes in a layer, then make a thin layer of onions, dot with cubes of butter, and sprinkle with salt and pepper to taste. Make another layer of potatoes, onions, and butter cubes, season the layer, and continue until you have used up your ingredients, finishing with a layer of potatoes. Pour the tomato sauce over all, cover the casserole with aluminium foil and bake for an hour. Remove the foil and bake for another half hour. Allow to rest for 10 minutes before serving.

We finished off our meal with fresh figs and a date cake that we purchased. I found the first two recipes at Counter-cultural School and the potato recipe here.

Everyone dressed up for the feast including dad and we had a great time! It was a lovely memory to make a big effort and it is one the kids remember well.

There are many other activities one might do on a day like this - you could make a sugar lump pyramidwrite your name in Hieroglyphics and make a cartouchedraw like and Egyptian, or mummify an orange. As we took about three weeks to complete our studies, we spread our hands-on activities out over those three weeks.

Enjoy!

Thursday, April 29, 2010

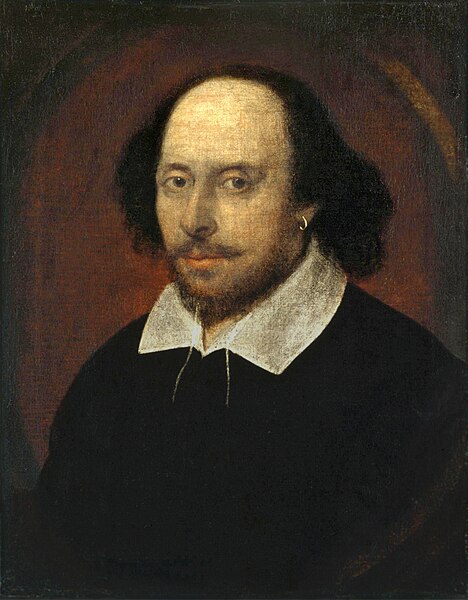
Celebrating the Bard's birthday


William Shakespeare was born April 23 and I thought it would be good fun to mark the day with a little celebration with the girls. I think exposing my children to his work and stories in a fun way early on will reap the benefits of dispelling any future apprehension when it comes to studying his plays and poems in later years. Also, the more familiar they are with the stories, the greater their enjoyment will be when they come to read his plays.

As we will actually be studying his life and times in greater depth when we start our Tapestry of Grace Year 2 studies after our summer holidays, I decided that I would concentrate simply on introducing the girls to some of his stories and doing a few fun things.

We started the week by reading aloud from William Shakespeare (Usborne Young Reading Series) which is an easy to read and entertaining summary of his life.


Then I read a few of his plays using both Beautiful Stories from Shakespeare by Edith Nesbit


and these books by Tony Ross and Andrew Matthews.


I also managed to download Shakespeare for Children by David Timson, an audio CD, from the National Library's e-resources Digital Media Collection (my favourite source of free audio books :) ) which we then listened to during our car journeys that week.


If you are keen to find creative ways to introduce Shakespeare to your kids, there is a wonderful lens here that has an abundance of great links to images, quotes, lesson plans, printables and audiobooks. A veritable treasure trove of ideas for teaching Shakespeare!

We started our celebrations by watching a few animated videos from Shakespeare: The Animated Tales. It is a BBC television program of 12 episodes, each episode showing an animated half-hour adaptation of one of Shakespeare's plays. You can find them very nicely gathered up here at this lens.

I printed out this sheet from Jimmescollage which is a drawing of a stage similar to the Globe and had the girls draw out a scene from one of the stories they had just watched.

They did a copywork sheet each of a quote I picked out which you can download here:


And finally, we ended our time by trading Shakespearean insults to our hearts content which was great fun. If you just type in "Shakespearean insults" on Google, you'll find many sites that provide you either with actual insults from the plays like these:
"You blocks, you stones, you worse than senseless things." - Julius Caesar

"Methinks thou art a general offence, and every man should beat thee. I think thou was created for men to breathe themselves upon you." - Alls Well That Ends Well

"What a disgrace it is to me that I should remember your name!" - Henry IV pt 2
or you will find sites that help you craft your very own insults. A big hit with my kids!

It was a fun little interlude to our day.

LinkWithin

Related Posts with Thumbnails